Index


Introduction

Dear MZ Owner,

we appreciate your purchase of a MZ motorcycle and thank you for your confidence in us.

The MZ 125 SX/SM motorcycles are based on 80 years of motorcycle construction experience in Zschopau. Both types have been developed for use according to the provisions of the road traffic regulations. These motorcycles are not suitable for hard off-road usage. You should keep this fact in mind when using your MZ 125 SX/SM.

Before you start riding your new motorcycle, please read all the information in this manual. This will provide you with important advice and information about the correct operation and handling of your motorcycle, as well as giving you useful information about regular care and maintenance.

Following these instructions and information is not just important for maintaining your vehicle in good condition, but is also in many cases a prerequisite for any claim under the warranty.

The owner's manual should always be kept with the motorcycle so that you can refer to them at any time. These owner's manual form an important part of the vehicle accessories and must remain with the motorcycle if it is resold.

Should a scheduled inspection be due, please bear in mind that the maintenance crew at your MZ workshop have been specially trained for this purpose.

Should you have problems or questions concerning your MZ 125 SX/SM, please refer to your MZ dealership for assistance. The crew there will always be pleased to assist you.

May you always enjoy riding your motorcycle!

MOTORRAD-UND ZWEIRADWERK GmbH
Alte Marienberger Straße 30 - 35
D-09405 Zschopau-Hohndorf


MZ 125 SM, right side


MZ 125 SX, left side


Explanation or the notes


The notes on safety and warnings included in these owner's manual are marked as shown below. Please pay special attention to these statements and instructions.


DANGER

Immediate danger causing serious injury to persons or death.


WARNING

Possible danger which may cause serious injury to persons or death.


ATTENTION

Possible danger or risky handling of the vehicle which may cause injury to persons or damage to property.


Each one of these safety precautions informs you of the following:

  • what kind of danger is at hand,
  • what may happen,
  • what you can do to avoid or reduce the risk of injury or damage to equipment.


Symbols used and their meaning:

DANGER in general
WARNING, ATTENTION in general
Important notices on environmental protection
Warning against hazardous voltage
Warning against crushing by the driving chain
Danger of crushing
Warning against corrosive liquids
Danger of fire
Warning against hot surfaces


Table of Contents

Operation
1.1 Vehicle identification
1.2 Operating elements
1.3 Ignition lock
1.4 Instrument panel
1.5 Left handlebar controls
1.6 Right handlebar controls
1.7 Gear change pedal
1.8 Fuel tank cap
1.9 Fuel cock
1.10 Seat lock
1.11 Rear wheel suspension
1.12 Front wheel suspension
1.13 Side stand
1.14 Foot brake pedal
1.15 Handlebar adjustments
1.16 Accessories
Driving instructions
2.1 Running in
2.2 Safe driving
2.3 Drive economically and protect the environment
Operating instructions
3.1 Starting the engine
3.2 Changing gear
3.3 Braking
3.4 Stopping the engine
3.5 Refuelling
3.6 Winter driving instructions
Maintenance
4.1 General remarks
4.2 Maintenance schedule
4.3 Lubrication points
4.4 Checking the oil level
4.5 Changing the oil
4.6 Clutch
4.7 Brakes
4.8 Tyres
4.9 Air filter
4.10 Fuel supply
4.11 Battery
4.12 Adjusting the headlights
4.13 Driving chain
4.14 Coolant
4.15 Cleaning and preserving
4.16 Storage
4.17 Recommissioning after storage
Self help
5.1 On-board tool kit
5.2 Changing the tyres
5.3 Changing spark plugs
5.4 Replacing fuses
5.5 Changing light bulbs
5.6 Troubleshooting
Technical data
6.1 Dimensions and weights
6.2 Engine
6.3 Carburettor
6.4 Transmission
6.5 Chassis
6.6 Electrical installation
6.7 Filling amounts and driving performance
Index
Notes
Circuit diagram


Safe driving and health


ATTENTION

Riding a motorcycle requires you to observe specific safety precautions to ensure your personal safety. Please familiarise yourself with these precautionary measures before you start riding.


Rules for safe riding


  • Always make a pre-ride inspection before you start the engine
    (see "&Pre-ride inspection", page 18).
    By doing this you protect the machine from damage and may prevent an accident.
  • The motorcycle must only be driven by persons in possession of a valid motorcycle driver's license.
  • Make yourself easy to see to avoid an accident which is not your fault:
    • Wear bright or reflective clothing.
    • Do not ride in the blind spot of other motorists.
  • Be especially alert at crossroads, exits and entrances and at side street junctions.
  • Observe the local laws and regulations of the country you are riding in:
    • Keep within the speed limits and never ride faster than conditions warrant.
    • Signal well before you make a turn or change lanes. Your size and manoeuvrability could surprise other motorists.
  • When driving, keep both hands on the handlebars and keep both feet on the foot rests. The passenger must always hold onto the motorcycle or the driver with both hands and have both feet on the pillion foot rests.


Protective clothing


  • Always wear a helmet. As well as boots, gloves and protective clothing you should also wear a face shield or protective goggles. Passengers should wear the same protective clothing.
  • Do not wear any loose clothing! This could get caught in the operating elements, the foot rests, the driving chain or the wheels.
  • The exhaust system becomes very hot when the engine is running and remains hot for a while after the engine has been switched off. Be careful not to touch any parts of the hot exhaust system. Only wear clothing that fully covers your legs.


Amendments


WARNING

Modifications to the motorcycle, removal of original parts, or the fitting of non-MZ spare parts and accessories may render the motorcycle unsafe and illegal.
The installation of a performance enhancing kit results in the loss of warranty and road traffic admission.
Any manipulation of the governor kit entails the loss of the warranty and all manufacturer product liabilities.


Operation

Vehicle identification

next ; Index


Key number:

The motorcycle comes with two keys for the ignition lock. There is a tag bearing the key number on the key-ring.

Keep this tag and the second key in a safe place, away from the motorcycle.

The key number must be stated when ordering a replacement key.


Vehicle identification number:

The vehicle identification number (1) is a unique identification of the motorcycle and must be given when registering it with the proper authorities.

This number is imprinted on the right side of the steering head column.


Enter the identification number of your vehicle here:


Engine number:

The engine serial number (1) is imprinted in the right-hand side of the engine.


Enter the engine number of your vehicle here:


Operating elements

next ; Index

  1. Ignition lock
  2. Clutch lever
  3. Left handlebar controls
  4. Fuel tank cap
  5. Fuel cock
  6. Gear change pedal
  7. Foot rests
  8. Hand grips
  9. Hand brake lever
  10. Throttle twist grip
  11. Right handlebar controls
  12. Foot brake pedal
  13. Seat
  14. Exhaust


Ignition lock

next ; Index


1.Parking position
Ignition off,
Parking lights on
Steering locked to the left
2.Ignition off,
Lights off,
Steering locked to the left
3.Ignition off
4.Ignition on


Instrument panel

next ; Index


  1. Reset knob for trip-mileage counter
  2. Left/right indicator
  3. Headlight control
  4. Idler control
  5. Warning light for cooling system
  6. Warning light "0il pressure too low"
  7. Tachometer
  8. Trip-mileage counter
  9. Odometer (kilometres)
  10. Speedometer (km/h or m.p.h.)


ATTENTION

Risk of engine failure!
The warning lamp (5) flashes when the cooling system is overloaded. The warning light (6) must go out by the time the engine reaches 2000 rpm. It remains on at higher speeds then the oil pressure is too low.
Pay attention to maintenance instructions, or see a MZ dealer for this service!


Left handlebar controls

next ; Index


1.Choke
1a Cold starting position,
turn 2 stages in arrow direction (depending on outside temperature)
1b Travelling position,
turn as far as the stop
2.Headlight flasher
3.Light switch
Off
Parking light
Headlight
4.Horn
5.Indicator switch
Left indicator
Right indicator
6.Dipper switch
Full beam ON
Dipped beam ON


Right handlebar controls

next ; Index


1.Engine stop button
Ignition interrupted
Ignition, ON (Function is active if the corresponding symbol is covered by the switch.)
2.Starter button


Gear change pedal

next ; Index


Adjusting the angle of the gear change pedal:

  1. Loosen the clamping screw (2).
  2. Pull off the gear change pedal (1) and put it on again in the desired position.
  3. Tighten the clamping screw (2).
Gear shifting pattern
(1)1st gear
(0)Neutral
(2)2nd gear
(3)3rd gear
(4)4th gear
(5)5th gear
(6)6th gear


Fuel tank cap

next ; Index


(A)Open:
 Turn the tank cap anti-clockwise.
(Z)Close:
 Put cap on and turn it clockwise.


ATTENTION

Fuel can leak out. Before you start your ride make sure that the fuel tank is closed tightly.


Fuel cock

next ; Index


1.Reserve (3,6 l)RES
2.openON
3.closedOFF
4.Fuelfilter 


Seat lock

next ; Index


Removing the seat:

  1. Turn the bayonet socket (1) an 1/4 turn anti-clockwise.
  2. Lift the seat up to the rear and remove it.


Mount the seat:

  1. Slide the seat below the screw at the tank, and simultaneously press the holding clip on the rear frame and hold it pressed.
  2. Turn the bayonet socket (1) an 1/4 turn anti-clockwise.


WARNING

Danger of falling!
Check the safe retention of the seat before you drive!
Never ride with a helmet hanging from the motorcycle! So the helmet can cause an accident.


Rear wheel suspension

next ; Index


(1)Nuts for adjusting the spring preload
(L)Spring preload length

The spring preload has been preset in the factory for a person of approximately 75 kg. An adjustment is necessary if the motorcycle predominantly carries two people or the permissibie overall weight.

L = 175 mm:

  • 75 kg (1 person)

L = 175 - 172 mm:

  • 2 persons or permissible overall weight (172 mm for heavy pillion-rider and for long and bad stretch)

Intermediate positions are possible.


ATTENTION

Risk of dazzling by modified headlight aiming!
The headlight setting must be corrected after the spring preload has been changed.


The damping effect of the spring shaft is not adjustable.


Front wheel suspension

next ; Index

The damping effect of the telescopic forks is not adjustable.

It must always move easily.

Therefore, always ensure that it is well maintained.

After dismounting and remounting the wheel, check the parallelity of both forks and correct if necessary.


Side stand

next ; Index

  1. Switch
  2. Side stand stay
  3. Side stand


The side stand is equipped with a switch that breaks the ignition circuit when the side stand is extended and the engine is put in gear. This makes it impossible to ride off when the stand is extended.


Foot brake pedal

next ; Index


The angular adjustment of the foot brake lever can be changed with the setting cam (1), which simultaneously serves as an end stop.

The adjustment of the angle must be completed by readjusting the play in the foot brake pedal:

  1. Loosen the nut (2) on the pressure rod.
  2. Turn the pressure rod until a play of 1 mm has been set.
  3. Tighten the nut (2) again.


Handlebar adjustments

next ; Index


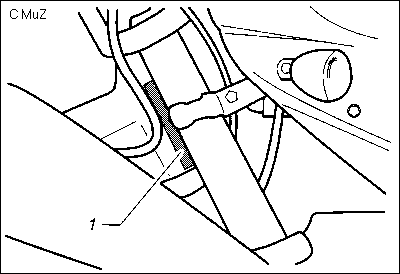
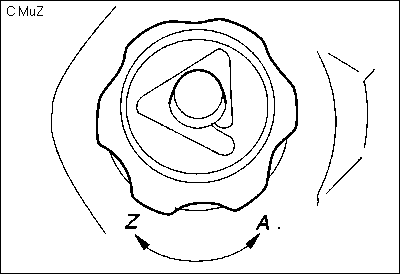
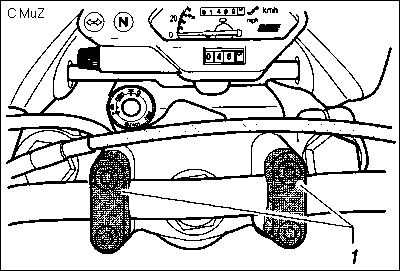
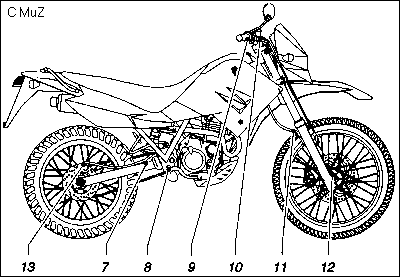
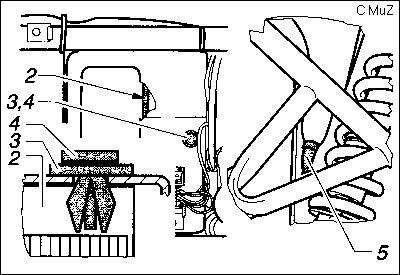
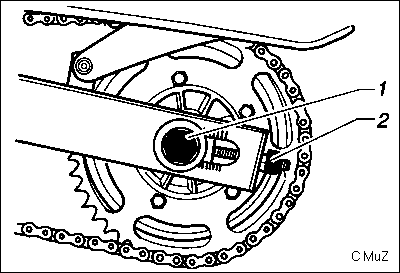
  1. Loosen the screws of the handlebar holding shells (1) until the handlebars can be rotated.
  2. Turn the handlebars into the desired position.
  3. Retighten the screws of the handlebar holding shells.


Tightening torque

Screws for the handlebar holding shells 25+5 Nm


ATTENTION

Danger of crushing!
When the handlebar are fully turned there must still be a gap of at least 3 cm between handlebar and tank.


Accessories

next ; Index

The only accessories which may be used are those which have been authorised by MZ for the MZ 125 SX/SM, or which do not detract from operating and road safety.

In this connection, please pay regard to the warranty conditions and the legal requirements.


ATTENTION

No warranty and road traffic admission when installing performance increasing components!


The following accessories are available through MZ's authorized dealers:

  • Engine protection
  • Top case carrier set
  • Roll bar set
  • Hand protection set
  • Assembly aid set
  • Fork protector set


Driving instructions

Running in

next ; Index

DANGER

Risk of accident!
New tyres do not have their optimal roadholding at first, therefore they must be run in.
Ride cautiously for the first 100 km (60 miles)!
Even run-in tyres have to warm up before they reach their maximal roadholding.


During the first few hours of operation the engine has a higher degree of internal friction. All the moving parts have worn in.

Therefore, observe the following instructions while running in during the first 1000 km (600 mi):

0 to 150 km (0 to 90 miles):

  • Vary the speed and the revs from time to time.
  • Keep the revs below 6000 rpm.
    Recommended speed:
    gear123456
    km/h203040506070


150 to 500 km (90 to 300 miles):

  • Keep the revs below 8000 rpm.
    Recommended speed:
    gear123456
    km/h254055658095
  • You can use the full engine speed range in all gears up to 8000 rpm. Do not ride at full throttle!


DANGER

Risk of accident!
New brake blocks do not reach their optimal frictional force for the first 200 km (120 miles). They must be worn in.
You can compensate for the somewhat reduced braking effect by exerting more force on the brake pedal or hand-brake.
The same applies after the brake blocks have been changed.


500 to 800 km (300 to 480 miles):

  • Do not ride for long distances at full throttle or longer stretches at over 8000 rpm.


After 800 km (480 miles):

  • The engine load can be increased to maximum for short periods.


ATTENTION

The engine oil and oil filter must be changed after the first 1000 km (600 mi), see the maintenance schedule.


After 1000 km (600 miles):

  • You can ride at full throttle.

If the RPM exceed 10500, the ignition box switches off the ignition current (rev limiter).


ATTENTION

Risk of engine and transmission damage!
The revs may not go into the area of the rev limiter.


If any problems become evident during the running-in period contact an authorised MZ Workshop without delay.


Safe driving

next ; Index

DANGER

Risk of accident!
Check the operational safety and roadworthiness of your motorcycle before every journey.
If you notice any irregularities, the necessary repairs must be made before starting the motorcycle!


Pre-ride checks:

The following list of checks does not take very long. The increased safety gained is worth much more than the few moments needed for the checks.

  • Front and rear brakes:
    Check the braking effect and brake fluid level.
  • Lights and horn:
    Check that the headlight, rear and brake lights, indicators, warning lights and horn are functioning properly.
  • Tyres:
    Check the condition and pressure of the tyres (see section Maintenance - Tyres).
  • Fuel level:
    Check the fuel level and fill up if necessary (see section Operation instructions - Refuelling).


WARNING

Risk of being scalded!
Hot oil can spray out.
Never open the cap on the oil tank while the engine is running.


WARNING

Risk of being scalded!
Never open the cooler cap while the engine is running.


  • Coolant level:
    Check the coolant level and top up if necessary (see section Maintenance - Coolant).
  • Driving chain:
    Check the condition and slack of the chain (see section Maintenance - Driving chain).
  • Throttle twist grip:
    Check for smooth opening and closing in all steering positions.
  • Clutch:
    Check efficiency, condition and free play (see section Maintenance - Clutch).


Individual riding styles:


ATTENTION

Your safety on the road is very much determined by your personal conduct and the way you drive.


Therefore:

  • Do not drive when you are tired.
  • Never drive when you are not fit to ride (for instance, when you are under the influence of alcohol, drugs or medication).
  • Always adjust your speed to road and traffic conditions.
  • Always observe traffic regulations strictly, especially the speed limits.
  • Ride your motorcycle in accordance with your riding ability.


Loading:


WARNING

Risk of accident!
Carrying baggage affects the motor-cycle's performance and stability.
Adjust your way of riding and speed accordingly!
Do not exceed the maximum authorised load.


If you want to take baggage with you, please observe the following instructions:

  • Keep the baggage weight as low as possible.
  • Place the baggage as near as possible to the centre of gravity of the motorcycle.
  • Distribute the weight as evenly as possible.
  • Check regularly that the baggage is secure. No part of the baggage or its securing gear may come into contact with any of the motorcycle's moving parts, e.g. a wheel.


Drive economically and protect the engine and the environment

next ; Index

WARNING

Increased engine wear! The engine should not be warmed up while stationary! First warm up the engine before riding at higher speeds.


When the engine is idling it takes a very long time for it to reach operating temperature. During the warm-up period the wear is especially high. Therefore, ride off with a low engine speed shortly after starting the engine. When the engine had warmed up a higher performance could be retrieved.


ATTENTION

Risk of environmental damage!
Do not accelerate at full throttle!
Try to avoid driving at maximum speed!


Using moderate acceleration reduces the fuel consumption, environmental damage and engine wear considerably.

Fuel consumption, exhaust gases and vehicle noise increase disproportionately at high speeds.


ATTENTION

Risk of environmental damage!
Do not run the engine at higher revs than necessary. Shift up as soon as possible and shift down only if the engine no longer runs smoothly.


The fuel consumption in second gear is more than double that in top gear. Reducing the engine speed also reduces the noise emission.


ATTENTION

Risk of environmental damage!
Drive at a steady speed and be alert!


Unnecessary acceleration and braking manoeuvres result in higher fuel consumption.


Operating instructions

Starting the engine

next ; Index

WARNING

Risk of poisoning!
There is a danger of poisoning if the engine is run in enclosed spaces.


A battery in good working condition is the prerequisite for a sure starting procedure.

Starting a cold engine:

  1. Open the fuel cock or switch to reserve, depending upon tank fuel level (see section Operation - Fuel cock).
  2. Fold side stand up, put the motorcycle in vertical position.
  3. Turn on the ignition.
    If the lights are on, switch the light on the left handlebar controls off (see section Operation).
    Thus all the battery power is available.


WARNING

Risk of accident!
The motorcycle can move off when you start the engine
Always make sure that the transmission is in neutral gear.


  1. Change the transmission into neutral gear (the control light for neutral must come on).
  2. Slide the motor stop switch to (left position).
  3. Open the choke in arrow direction. There are two choke positions. The lower the outside temperature, the bigger must be the choke opening (see section Operation).
  4. Do not open the throttle!
    Open the throttle somewhat if the motor does not start.


ATTENTION

Never press the starter button for longer than 5 seconds. If the engine does not start immediately, release the starter button, wait for 20 to 30 seconds and then press it again.


  1. Press the "START" button in the right handlebar controls (the starter starts the engine).
  2. Partially dose the choke.
  3. Close the choke contrary to arrow direction when the engine starts to run.


Starting a warm engine

  1. Open the fuel cock or switch to reserve, depending upon tank fuel level.
  2. Fold side stand up.
  3. Turn on the ignition.
    If the lights are on, switch the light on the left handlebar controls off (see section Operation - Handlebar control, left).
    Thus all the battery power is available.


WARNING

Risk of accident!
The motorcycle can move off when you start the engine
Always make sure that the transmission is in neutral gear.


  1. Change the transmission into neutral gear (the control light for neutral must come on).
  2. Slide the motor stop switch to (left position).
  3. Do not use the choke.
  4. Open the throttle max. 1/4 turn.
  5. Press the "START" button in the right handlebar controls (the starter starts the engine).

The engine stop switch on the right-hand handlebar serves to switch off the engine in cases of danger without operating the ignition lock.

Otherwise use the ignition lock to switch the engine on and off.

  1. After the engine has started, the driver and passenger can get on.
  2. Switch the light on.
  3. Ride off in first gear.


ATTENTION

Risk of damage to the regulator, rectifier and ignition box. Never start the engine without a or with a flat battery by pushing the motorcycle. Only use external batteries as a starting aid when the nominal voltage of the external battery is between >12 V and a maximum of 13.8 V, and if the capacity is not higher than your motorcycle's own battery!


Changing gear

next ; Index

ATTENTION

Risk of damage to the gear box, engine and transmission.
Never try to change gears without disengaging the clutch.


The gear change pattern is shown in Operation section.

To shift up or down, pull the clutch lever completely to the stop, change to the next gear and then release the clutch lever slowly.

To change into neutral gear, activate the clutch while repeatedly pressing down the foot pedal (some resistance will be noticed in first gear), then let the foot pedal up gently.


ATTENTION

When starting an 125 SX/SM governed to 80 km/h, keep the engine speed below 6500 rpm.
Otherwise a quick start is impossible.


Braking

next ; Index

Always apply both brakes simultaneously. Just using one brake reduces the braking effect.


DANGER

Risk of accident!
Never brake too hard!
This can lead to the wheels locking and the motorcycle going out of control


Please observe the following instructions:

  1. Reduce speed when approaching a curve. Braking in a curve may cause skidding.
  2. Apply the brakes with care on wet roads.
  3. On long, steep, downhill stretches use the braking effect of the engine by shifting down. You can supplement this by applying both brakes intermittently.


Stopping the engine

next ; Index

WARNING

Danger of burning!
The exhaust silencer and pipes can become very hot. Always park the motorcycle so that pedestrians and children cannot come into contact with these parts!


Switch off the ignition.

To be able to switch the ignition key to or press it in (thus unlocking it) and turn it.

Lock the steering to prevent theft. Close the fuel cock.


ATTENTION

Do not park the motorcycle on soft or sloping ground. If the motorcycle is left unattended (even for a short period) always remove the ignition key and close the fuel cock.


Refuelling

next ; Index

DANGER

Risk of fire and explosion.
Never refuel in an enclosed space!


Recommended fuel:

Non-leaded, regular petrol with an octane rating of 95 (ROZ) or higher.


WARNING

Do not overfill the fuel tank!
Make sure that no fuel is spilled onto the hot engine. After refuelling, screw the tank cap on tightly.


Fuel tank capacity:
Total:   12,5 l
Reserve:   3,6 l


Fill the tank so that at least 20 mm space remain between the lower edge of the filier neck (1) and the fuel level when the motorcycle is resting on its side stand.

The fuel corrodes the paintwork and plastic parts. Wipe up spilt fuel immediately.


Winter driving instructions

next ; Index

ATTENTION

Risk of accident!
The standard fitted tyres have restricted suitability for riding on snow and ice.


If you also drive your motorcycle in winter and live in a country with a moderate or cold climate, please observe the following instructions:

  • Before winter starts, protect the chromium-plated and unprotected metal and painted parts with a corrosion protection agent recommended by a specialist dealer.
  • Apply this corrosion protection agent to the motorcycle as specified in the maintenance schedule.
  • Before the winter period Starts, treat the ignition lock with a commercially available lock lubricant.
  • Remove all superfluous preservative measures at the end of the winter period.
    This does not apply to the electric plug connections.
  • Let your MZ dealer:
    • treat plug and socket parts of the cable harness with a contact care substance,
    • wipe excess contact spray off carefully,
    • check the antifreeze content of the coolant.


Maintenance

General remarks

next ; Index

ATTENTION

If you do not possess the necessary tools or knowledge to carry out repairs or maintenance you are advised to get this work done by your authorised MZ dealer!


Improperly performed repairs and maintenance work may lead to the loss of warranty claims.

Regular maintenance work, adjustments and lubrication carried out at by your authorized MZ dealer provide the basis for many years of safe and efficient operation of your motorcycle.

All maintenance work should be carried out at regular intervals.

The distance intervals specified in the maintenance schedule are guidelines. They may be affected by the following factors:

  • How you ride
  • Weather conditions
  • Surface conditions
  • Geographie location.


WARNING

Do not make any of your own adjustments or changes to the engine or chassis components. In so doing you put yourself and others at risk.


Depending on the severity of the abovementioned factors, even shorter intervals may be necessary.

The instructions in this chapter provide you with information on how to perform small maintenance tasks and help in the event of a break down.

The on-board tool kit supplied is primarily intended for use in case of a break down.


During the warranty period, all work should be carried out by your MZ dealer.

Fire and safety at work regulations must be observed during all care and maintenance work!

Only use the fuel and lubricants recommended by us!

Top up lubricants or brake fluid only with the original fluids. Mixtures can have adverse effects or cause damage.


ATTENTION

Risk of environmental damage!
Please observe the environment and fire protection regulations when handling fuel and lubricants!
Dispose of used oil according to the legal regulations!


Let your MZ dealer determine the cause of losses of fuel, lubricants and brake fluid - there could be a leak!


Maintenance schedule

next ; Index

Engine and gearbox

before drivingafter 1st
1,000 km
every 6,000 km
or yearly
every
12,000 km
every
two years
W=workshop
S=compliance with values and data
Check the clutch clearance
*
*
*
*
 
S
Check the valve clearance, adjust if necessary 
*
*
*
 
W/S
Check the cooling system:
Check filling amount/density/anti-freeze compound
 
*
*
*
replace 
Oil change,
clean coarse screen
 
*
*
*
  
Oil filter change 
*
*
*
  
Check the oil level / top up
after each 1,000 km
Tighten the exhaust pipe fitting to the cylinder 
*
*
*
 
W
Check the engine mountings 
*
*
*
  
Clean the carburettor 
*
*
*
 
W
Check the carburettor adjustments 
*
*
*
 
W/S
Measure the exhaust fume values 
*
*
*
 
W/S
Check the camshaft chain   
*
 
W


Electrical Installation

before drivingafter 1st
1,000 km
every 6,000 km
or yearly
every
12,000 km
every
two years
W=workshop
S=compliance with values and data
Check the lighting and signalling systems
*
    
W/S
Check the headlight adjustment 
*
*
*
 (after adjusting the spring preload)
Check all accessible contacts, treat with contact spray  
*
*
  
Spark plugs: Check condition, clean and replace if necessary 
*
*
*
 
S
Check the air-gap of the pick-up sensor (ignition)   
*
 
W/S
Check the electrolyte level in the battery and the cable terminals
every 6 weeks
S


Chassis

before drivingafter 1st
1,000 km
every 6,000 km
or yearly
every
12,000 km
every
two years
W=workshop
S=compliance with values and data
Check the braking efficiency
*
 
*
*
 
S
Check the brake fluid level
*
    
S
Change the brake fluid    
*
W
Check the thickness of the brake linings
every 2,000 km
S
Grease the ball joint between the shock absorber and the reversing lever  
*
*
 
W
Check and service the telescopic forks  
*
*
 
W
Change the forks oil in the telescopic forks    
*
 
Check the pressure and condition of the tyres
*
    
S
Check the wheel rim eccentricity  
*
*
  
Check the clearance on the wheel bearings  
*
*
  
Check the damping of the rear wheel drive  
*
*
  
Clean/change the fuel filter 
*
*
*
  
Clean the air filter
every 6,000 km (or more frequently, depending upon conditions of use)
 
Replace the air filter
every 12,000 km (or more frequently, depending upon conditions of use)
 
Empty the condensate collector under the intake muffler  
*
*
  
Check that all bolts, screws and hose clips are tight 
*
*
*
 
W/S
Check the chain slack and wheel tracking
every 500 km (or more frequently, depending upon conditions of use)
W
Clean and lubricate the chain
every 500 km (or more frequently, depending upon conditions of use)
 
Lubricate the hand lever and throttle twist grip
yearly (or more frequently, depending upon conditions of use)
 
Check and lubricate the Bowden cables
yearly (or more frequently, depending upon conditions of use)
 
Lubricate the speedometer drive
yearly (or more frequently, depending upon conditions of use)
 
Clean and lubricate the sliding surfaces and bearings 
*
*
*
 
W
Check the side stand switch 
*
*
*


Lubrication points

next ; Index


 Lubrication pointLubricant
(1)Clutch leverOil
(2)CablesOil
(3)Steering bearingRoller bearing grease
(4)Side stand bearingRoller bearing grease
(5)ChainChain spray for 0-ring chains
(6)Wheel bearingRoller bearing grease
(7)Ball joint on the shock-absorbing leg, bottomGrease or spray (MoS2)
(8)Foot brake pedalRoller bearing grease
(9)Throttle twist gripRoller bearing grease
(10)Hand brake leverRoller bearing grease/Oil
(11)Speedometer driveOil
(12)Speedometer drive in the front wheelRoller bearing grease
(13)Sliding bolt brake caliperGrease MoS2


Checking the oil level

next ; Index

The engine has pump circulation lubrication. Oil is supplied by a feed pump to the parts of the engine and transmission to be lubricated.


WARNING

Risk of being scalded!
Hot oil can spray out.
Never remove the oil filler plug while the engine is running.


Checking the oil level:

Check the oil level after every 1,000 km while the engine is cold.

  1. Stand the vehicle in an upright position on level ground.
  2. Screw the oil filler plug, together with the dipstick, out of the oil filler nozzle and wipe the stick.
  3. Screw in the oil tank cap until it stops and read the oil level after screwing it out again.
  4. The oil level must be maintained between the MIN and MAX marks. Top up the oil if necessary, but never above the MAX mark.

Top up about 200 cm³ (0,2 l) of oil is the MIN level is reached.


ATTENTION

Risk of engine failure and increased wear and tear!
Never run the engine with insufficient oil!


Changing the oil

next ; Index

Let your MZ dealer change the oil and oil filter generally.

The workshop fulfils the requirements for disposing of the used oil in an environmentally safe way and also offers an expert service.

The oil is to be changed at the intervals shown in the maintenance schedule. The following points are to be observed:

  1. Warm the engine (oil) up or change the oil after having driven the motorcycle.
  2. Place the motorcycle on a flat, level surface in vertical position.
  3. Place a container underneath the engine to collect the oil.
  4. Loosen the oil return plug (4).


WARNING

Danger of burning!
Hot oil can spray out.
Never remove the oil filler plug immediately after running the engine under heavy load.


  1. Screw out the oil filler plug (5).
  2. Screw out the oil drain plug (1).
  3. Screw out the screw plug (2) together with the oil screen, be careful with the seal.
  4. Let the oil drain out completely.
  5. Dismount the oil filter cap. (screws 3 and 4).
  6. Remove the oil filter.


ATTENTION

Damaged seals and sealing rings are to be renewed before reassembly!


ATTENTION

Risk of environmental damage!
Oil must not be poured into the sewage system or onto the ground.
The used oil must be disposed of according to the regulations.


  1. Soak the new filter together with an 0-ring in oil, then insert it, renew the seal and screw the cap on tightly (screws 3, 4).
  2. Clean the coarse screen of the screw plugs and the magnet of the oil drain plug.
  3. Screw in the oil drain plug (1) and the screw plug with the coarse screen (2) and tighten.
  4. Fill 1.4 l of oil into the engine and screw in the oil filler plug.


WARNING

Danger of burning!
Hot oil can spray out.
Never remove the cap on the oil tank while the engine is running!


  1. Check the oil level (see section Checking the oil level).

Check for leaks after changing the oil!

Oil quantities:

Oil change with filter change:    1,4 l
Oil change after dismounting the engine:    1,4 l

Oil types:

All the recommended oils can be used throughout the whole year.

SAE15 W-50 API SG/SH
SAE10 W-40 API SG/SH

Use only brand name oils are to be used. MZ's recommendations for types of oil must be observed.


ATTENTION

Apply the correct torques to all bolts!


Torques
Oil drain plug (1)20+5 Nm
Screw plug, oil screen (2)30+5 Nm
Oil filter cap screws (3)8+2 Nm
Oil return plug (4)8+2 Nm


Clutch

next ; Index


The free play on the clutch can be adjusted either on the clutch hand lever or on the engine.


Adjustment:

  1. Loosen the lock nut (1).
  2. Make the setting with the adjusting screw (2):
  3. Screw in:
    -> more clutch play.
    Screw out:
    -> less clutch play.
  4. Screw the lock nut (1) on tightly.


The free play on the end ofthe lever should be between 5 and 10 mm (0.2 to 0.4 in.).

If it is no longer possible to set the required free play, an MZ dealer must check the internal clutch mechanism.

Braking

next ; Index

WARNING

Risk of accident!
Air in the brake system reduces the braking efficiency and is dangerous for you and others.
Check the brake fluid level before every ride!


Please note that new brake blocks have to be worn in during the first 200 km (120 miles) in order to develop their optimal braking effect.

If there is not enough brake fluid, air may get into the braking system and reduce the braking efficiency.

For your own safety, bleeding the brakes should be carried out by your MZ dealer.


Checking the brake fluid level in the front wheel brake:

The brake fluid reservoir is situated next to the hand brake lever.

When the brake fluid reservoir (1) is horizontal, the level of brake fluid must not sink below the middle of the round viewing window (2).


Checking the brake fluid level in the rear wheel brake:

The brake fluid reservoir is on the right under the seat near the suction silencer.

The brake fluid level must be visible between the MIN and MAX marks.


WARNING

Brake fluid is poisonous!
Avoid contact with the skin!
Keep brake fluid in the original container out of the reach of children!
Brake fluid corrodes paint and plastic components.


Instructions:

Only use high quality brake fluid (DOT 4) as lower quality products do not have the chemical characteristics required and can corrode the rubber seals.

Old brake fluid tends to form vapour locks when put under heavy load (riding downhill and frequent braking). This leads to a serious reduction of the braking efficiency and a loss of safety on the road.

For your own safety, adjustments to the brakes should be carried out by your MZ dealer.

Let your MZ dealer determine and eliminate the cause of a loss of brake fluid. Your machine is not roadworthy if the brake blocks are worn (wear marks) or the brake system leaks!

Brake fluid corrodes paint and plastic components. Therefore, wipe up spilt brake fluid immediately.

Have the brake fluid and rubber seals renewed by your MZ dealer every 2 years.

The brake hoses should be replaced every 4 years by your MZ dealer.


Brake caliper

  1. brake disc
  2. wear marks
  3. brake pad


Checking the brake pads:

The thickness of the brake pads at the front and rear must on no account be less than 2.0 mm (0.07 in) otherwise the brake discs can be damaged!

The brake pads must be replaced by your MZ dealer.

When the wear mark (2) is no longer visible, the brake pad must be replaced by a new one!

Checking the brake discs:

The minimum thickness of the brake disc is impressed on the brake disc.

The brake discs must be replaced by your MZ dealer.


Tyres

next ; Index

Check the tyre pressure before every journey while the tyres are cold

(tyre temperature = outside temperature).

The tyre pressure should correspond to the values in the table:

SX
Load1 or 2
persons
75 kg each
maximum
permitted axle
load.
front200 kPa
2 bar
29 psi
250 kPa
2,5 bar
36 psi
rear200 kPa
2 bar
29 psi
250 kPa
2,5 bar
36 psi


SM
Load1 or 2
persons
75 kg each
maximum
permitted axle
load.
front200 kPa
2 bar
29 psi
250 kPa
2,5 bar
36 psi
rear230 kPa
2,3 bar
33 psi
260 kPa
2,6 bar
38 psi


WARNING

Risk of accident!
Worn tyres reduce the motorcycle's stability and may lead to accidents. Replace worn tyres with new ones!
Let your MZ dealer or authorised workshop perform tyre repairs and replacements!
Always ride with the correct tyre pressure!


Observe the legal tread depth in your country.

In any case, the tyres should be changed, at the latest, when the tread depth is down to 2 mm (0.07 in).


ATTENTION

Use only those tyres which are approved for your motorcycle (see the Technical Data section and the entries in the authorisation documentation)!


Air filter

next ; Index


The air filter (2) must be removed for cleaning:

  1. Remove the intake pipe (1).
  2. Lever out the body-bound rivet (4) with a suitable tool (e.g. screwdriver).
  3. Lever out the body-bound rivet (3).
  4. Clean the filter by knocking it out or blowing it out with compressed-air


WARNING

Risk of fire and explosion! It is forbidden to smoke when handling fuel or cleaning fluids with similar properties.


Before refitting:

  1. Wipe out the air filter casing.
  2. If necessary, empty the condensate collector (5) on the underside of the air filter casing.
  3. Reattach the condensate collector (5) with the clamp.
  4. After the filter has been re-fitted, insert the intake pipe (1) with the circular groove tightly.


Fuel supply

next ; Index


WARNING

Risk of fire and explosion. It is forbidden to smoke when handling fuel or cleaning fluids with similar properties.


Maintenance work on the fuel supply is required if there are any faults in the following components:

Tank:

If the tank is dirty it must be rinsed out. This work is best done by your MZ dealer.

Fuel cock:

A filter (1) is fitted inside the tank in front of the fuel cock. In order to clean it, the tank must be emptied and the fuel cock unscrewed.

Screw off the filter and clean it.

External fuel filter:

Clean this filter in the same intervals as the fuel cock filter.

Replace the filter if necessary.

Carburettor:

The cleaning of the carburettor, especially the jets must only be performed in a workshop.

For this purpose the carburettor must be dismounted from the engine.

The carburettor has been optimally adjusted by the manufacturer or during the inspection by your MZ dealer.

Any unauthohsed change of the settings has a negative effect on the following:

  • Engine performance
  • Petrol consumption
  • Exhaust emissions
  • Environment


Petrol hose and connections:

  • Check that the clamps are tight.
  • If required, replace the hose with an original hose from the MZ dealer.


Battery

next ; Index

WARNING

Risk of acid burning!
Battery fluid must not come into contact with eyes, skin or clothing.
Acid splashes must be thoroughly rinsed off with water immediately. If necessary seek medical attention.


The battery (2) is located behind the left lateral lining. In the Standard model a normal lead accumulator is used.


  • Keep the battery connections clean and always preserved with battery grease!
  • Check the electrolyte level periodically. The level must be maintained between the MIN and MAX marks (two lines on the battery case).
  • Only use distilled water to top up.


ATTENTION

Risk of damage to the on-board electronics!
Always keep the battery well charged!


  • Ensure that the battery is securely fitted (2)! The fixing strap (3) of the battery fastenings must not be porous. It is to be fitted like in the illustration (alongside of the cover).


If the motorcycle is not going to be ridden for over 1 month, the following steps are to be undertaken before putting it in the garage:

  1. Remove the battery and store in a dark place where the temperature is between 5°C/40°F and 20°C/68°F. If necessary, the battery must be re-charged first.
  2. When removing the battery, first disconnect the negative lead and then the positive! Dismount the tank spoiler and partly the left lateral lining and cautiously pull it to the left in order to remove the battery.
  3. When reinstalling, first connect the positive lead and then the negative! Insert bush (1) between cable lug and pole terminal. Ensure that the pole terminals are securely fitted!


The positive pole must be covered by a rubber cap.


WARNING

Store the battery out of the reach of children!
Remove the battery from the motorcycle before recharging.


Before driving the motorcycle again, check that the battery is charged.


WARNING

Risk of fire and explosion.
Ensure an adequate ventilation in the area where you are charging the battery!
Smoking and naked lights are forbidden!
Avoid making sparks!


Adjusting the headlights

next ; Index


WARNING

Risk of accident!
If your headlights are set too high you endanger yourself and others.
Always drive with the headlights properly adjusted! Let the headlights adjust once a year.
If the spring preload on the shock-absorbing leg or the load has been changed, then the headlight must be adjusted.


Temporary adjustment to headlight may be made as follows:

  1. Load the motorcycle with the weight it usually carries.
    The spring preload on the shock-absorber must correspond to this load (see section Operation - Rear wheel suspension).
  2. Stand the motorcycle horizontally (not on the side stand) facing a vertical wall (do not put it on Stands) at a distance of 5 m (5.5 yards).
  3. Measure the distance from the centre of the headlight to the ground.
  4. When the headlight is correctly adjusted, the light-dark border of the luminous cone of the dipped headlight must appear 140 mm (5.6 in) below the centre point of the headlight marked on the wall.

Setting:

  1. Loosen the headlight screws (1) by about two turns.
  2. Tilt or swivel the headlight casing.
  3. Retighten the screws (1).


Driving chain

next ; Index


The driving chain is one of the most important transmission components on your motorcycle.

Chain care

Keep the chain clean and lubricated! Wash periodically with copious water (non-pressurised) and then care is made with O-Ring chain spray.

Check the chain slop periodically.


ATTENTION

If the chain slack is incor-rectly set, it overloads the engine and other important components. Keep the chain slack within the set limits (60 - 70 mm)!


To check the slack in the chain, stand the motorcycle up vertically.

The rear wheel must turn freely. To do this prop the motorcycle up with a suitable support (e.g. assembly aid of the accessories) under the front pari of the frame.


WARNING

Risk of injury!
Do not put your fingers between sprocket and chain!


Turn the rear wheel several times and measure the chain slack at various places in order to establish where it is tightest. The valid measurement is made at the tightest part of the chain. This is done by moving the chain up and down.

Correct the chain slack if it is too tight (slack < 60 mm) or to loose (slack > 70 mm):

  1. Loosen the axle nuts (1) on the chain adjuster by about one turn on each side
  2. To reduce the chain slack:
    Turn the nuts (2) to the right on both sides.
    To increase the chain slack:
    Turn the nuts (2) to the left on both sides and slide the wheel forwards. Turn the nuts (2) by the same amount on both sides so that the axle remains aligned.
  3. Tighten the axle nuts (1) on both sides.
  4. Once the adjustments have been made check the wheel tracking and correct if necessary.


Torques
Axle nuts (1)100+10 Nm


Coolant

next ; Index


Checking the coolant:

The coolant level should be checked after the first 1,000 km, and then after every 6,000 km by the MZ dealer.


WARNING

Overpressure causes a risk of being scalded. Do not open the radiator cap when the engine is hot.


  1. Remove the radiator cap (1) by turning it to the left.
  2. Check the fluid level.
    When the engine is cold, the fluid level should bejust underneath the lower sealing surface of the radiator cap.


ATTENTION

Insufficient coolant may result in engine damage. Get your MZ dealer to repair leaks of coolant immediately!


Refilling the coolant:

  1. Stop the engine and let it cool down.
  2. Open the radiator cap.
  3. Fill the radiator system with a mixture of high quality proprietary coolant for aluminium engines and distilled water.

At least the proportion of mixture is to be designed for -20°C (-4°F).

This corresponds approximately to a 50/50 mixture anti-freeze and water (please observe the instructions of the coolant manufacturer).

If the recommended coolant is not available, water can be used temporarily. However, refill with the recommended coolant at the first opportunity.


Cleaning and preserving

next ; Index

Frequent and thorough cleaning not only improves the appearance of your motorcycle but also improves its overall operating performance.

The life expectancy of many engine components will be increased and corrosion prevented.

  1. Seal the end pipe of the exhaust to prevent water entering.

    The following areas are to be protected from water getting in
    • carburettor and the intake area below the seat,
    • wheel hubs, brake caliper,
    • instruments, ignition switch,
    • driving chain.
    • exhaust outlet,
    • main brake cylinder,
    • handlebar switches.
    • space under the seat fairing (ignition box, fuse holder),
    • lower fixing eye of the shock absorber.
  2. Make sure the spark plug and all filling caps are securely closed.
  3. Soften up heavy soiling with copious water before the actual washing process.
  4. Use detergents which do not attack the paintwork or other protective surface layers to remove dirt. Pay attention to the information provided by the manufacturer of the cleaning substance.
    A brush helps to clean heavily soiled places.
  5. Thoroughly rinse dirt and cleaner off with water.


ATTENTION

High pressure water, e.g. from a high-pressure cleaner, can damage components of the motorcycle. Therefore only clean with a low-pressure water jet!


  1. Immediately after washing, dry all surfaces with compressed air or a soft cloth.
  2. Dry the chain and lubricate it straight away with chain spray to prevent rust formation.
  3. Clean the seat with a vinyl upholstery cleaner to keep the cover soft and shiny.
  4. Car wax can be applied to all the painted and chromium-plated parts of the motorcycle. Compound cleaning and waxing agents should not be used.
  5. Remove the end pipe seal.
  6. Start the engine and go for a short test ride.
  7. Treat the exhaust system with a care product for stainless steel.
  8. Slide back the protective caps on the operating levers on the handlebars, dry the surfaces underneath and lubricate the joints.


WARNING

Risk of accident!
Directly after washing, the braking efficiency may be reduced. Until you have dried the brakes by light braking, keep a suff icient distant from the vehicles in front of you to allow for longer braking distances!
Environment
Ensure that you dispose of the waste water according to the regulations.


Storage

next ; Index

If you are going to störe your motorcycle for an extended period (30 days or more) then a number of precautionary measures must be taken to prevent any damage during this period. After the motorcycle has been thoroughly cleaned, prepare the motorcycle for storage as follows:

  1. Empty the fuel tank, the fuel line and the float housing of the carburettor.
  2. Check the level of the coolant and its antifreeze content, top up if necessary.


ATTENTION

Avoid making sparks.
When using the starter just to rotate the crankshaft, the spark plug cable must be removed and grounded so that there are no sparks.


  1. Remove the spark plug, squirt a little engine oil SAE 10W40 or SAE 10W50 into the spark plug hole, then replace the spark plug. Turn the engine over a few times with the starter (ground the ignition cable) in order to distribute the oil over the cylinder walls.
  2. Thoroughly clean the driving chain and grease it.
  3. Lubricate the bowden cables.
  4. Oil the joints of the operating levers and foot rests.
  5. Adjust the tyre pressure to that correct for one rider.
  6. Put the motorcycle on stands so that both wheels are off the ground.
  7. When storing in humid or saity air, all exposed metal surfaces must be protected by a light film of oil. Do not allow oil to come into contact with rubber components or the seat.
  8. Treat plug and socket parts of the cable tree with a contact care substance.
  9. Remove the battery, recharge it and store it in a dry place. It must be recharged once a month. The battery must not be stored at either very high or very low temperatures (over 30°C/86°K or below 0°C/32°K).


ATTENTION

All necessary repairs should be made before putting the motorcycle into storage. Do not start the engine during the storage period!


Recommissioning after storage

next ; Index

  1. Charge the battery and install it ensuring that the polarity is correct (black cable without protective cap - minus, black cable with protective cap and thin red positive cable).
  2. Fill the tank with new petrol.
  3. Check the oil level.
  4. Check the coolant level.
  5. Check the brake fluid level.
  6. Change the engine oil and the oil filter after a longer period of storage (more than one year.
  7. Check the tyre pressure.
  8. Check operating safety and roadworthiness in accordance with the road traffic regulations.


Self help

On-board tool kit

next ; Index


The on-board tool kit is located in a tool bag beyond the seat.

The on-board tool kit contains:

  1. spark plug spanner * with rubber insert for fixing the loose spark plug
  2. ring spanner 24, 2 items
    ring spanner 22, 1 item
  3. open-jawed spanner 32, 2 items for adjusting the suspension spring preload
  4. open spanner 13x17
  5. hexagon socket head wrench 5
  6. reversible screwdriver, also to be used as a pin for the spark plug spanner.

* attaching to the ring spanner (2) or the open-jawed spanner 32 (3) ensures better lever


Changing the tyres

next ; Index

A tyre change can only be performed by an authorised workshop, because they have the necessary equipment.


Changing spark plugs

next ; Index


To change the spark plug please perform the following steps:

  1. Switch off the ignition
  2. Remove the spark plug cap (1)
  3. Poke a wire through the spark plug space drain borehole (2) so that any water in the spark plug space drains out.
  4. Screw the spark plug out with the spark plug spanner (with rubber insert) using the reversible screwdriver as a tommy bar.
  5. Clean the spark plug if necessary, check the spark gap (0,7 mm, 0.027 in) or replace the spark plug.
  6. Clean the plug gasket before reinserting.
  7. Screw the spark plug in with a spark plug spanner.
  8. Replace the spark plug cap.


Replacing fuses

next ; Index

  1. fuses
  2. replacement fuses
  3. toolbag


The fuse box (1) is located under the seat. Remove the seat to gain access.


Specified fuses
Main fuselight-blue
blade-type fuse 15 A
Fan fusebrown
blade-type fuse 7,5 A
Indicator fuseviolet
blade-type fuse 3 A


WARNING

Danger of fire and risk of damages to the vehicle-borne electronics!
Using another device as a bypass leads to serious damage to the electrical system or to fire.
Never use a fuse with a higher current rating than that specified!


If a fuse blows, turn off the ignition and insert a new one with the correct amperage.

If the new fuse blows please contact an authorised MZ dealer.


Changing light bulbs

next ; Index

ATTENTION

Only use light bulbs conforming to the technical specifications supplied. Do not touch the lamps with your bare hands but with a clean, soft towel!


Rear light:

  1. Loosen the screws of the rear light and remove the casing.
  2. Change the bulb (bayonet socket).
  3. Refit the rear light casing.


Indicator light:

  1. Remove the screw on the back of the indicator casing.
  2. Remove the indicator light bowl.
  3. Change the bulb (bayonet socket).
  4. Reassemble in the reverse order.


Headlights:

  1. Loosen the screws (1) on the right and left side of the headlight casing.
  2. Remove the casing.

Do not damage the coating.

  1. Pull the plug-in socket (2) off the headlight bulb or the plug-in socket (3) off the parking light bulb.
  2. Change the bulb.
  3. Reassemble in the reverse order.


Control lights:

  1. Unscrew the fixing screws of the direction indicators (1) on either side.
  2. Remove the indicator lights and pull off the plug, remove the headlight (2) and the parking light (3) cable.
  3. Remove the headlight and lay it down safely.
  4. Pull the defective control light out off the tachometer (do not pull on the cable).
  5. Press in a new control light.
    Only use original spare lights.
  6. Reassemble in the reverse order to that of removal.
  7. Check the headlight adjustment.


Instrument illumination:

  1. Unscrew the indicator holding screws (1) on either side.
  2. Remove the indicator lights and pull off the plug, remove the headlight (2) and the parking light (3) cable.
  3. Remove the headlight and lay it down safely.
  4. Pull the defective light out off the speedometer (do not pull on the cable!).
  5. Press in a new light.
    Only use original spare lights.
  6. Reassemble in the reverse order to that of removal.
  7. Check the headlight adjustment.


Troubleshooting

next ; Index

Although all MZ motorcycles are subject to strict inspections at the factory before dispatch and are made ready for the road by the dealer, some problems may still arise during operation.

Problems with the fuel system, compression or with the ignition system can impair the starting efficlency and cause a deterioration in performance.

The diagram of the troubleshooting guide shows the procedures that enable the functional areas to be checked easily.

If your motorcycle needs to be required, please take it to your authorised dealer. The qualified mechanics at an MZ dealer have the necessary tools, training and experience to be able to repair your motorcycle expertly.

Only genuine MZ spare parts are to be used for repairs!


DANGER

Risk of an electric shock!
When working on the ignition system there is danger from the high voltage. Therefore switch off the ignition!


ATTENTION

Risk of fire and explosion!
Work on the fuel system involves a risk of fire and explosion.
Smoking, naked lights and sparks are forbidden. Ensure a sufficient ventilation.


Technical data

Dimensions and weights

next ; Index

DIMENSIONS [mm]MZ 125 SX variantMZ 125 SM variant
Overall length21852010
Overall width with/without mirror960/770960/770
Width of handlebars770770
Overall height with/without mirror1340/12001280/1160
Unloaded seat height860830
Wheel base1440 ± 151440 ± 15
Caster10773
Steering angle63.564.5
Steering angle left/right40°40°
Turning circle [m] [m]3.53.5
Ground clearance with permissible load with/without engine protection200/250170/220
WEIGHTS [kg]
Unladen weight (ready-to-ride)127.5129.5
Unladen front axle load58.560
Unladen rear axle load6969.5
Total weight permitted320320


Engine

next ; Index

TypeMZ125
Method of operation/ controlspark ignition, 4-stroke ignition engine, DOHC, 4 valves activated via cup tappets
cylinder1, in vertical position, tilted 10 degrees to the front side
Cylinder capacity124 cm³
Output at rpm11 kW / 9000 rpm
Maximum torque at rpm11.7 Nm / 8500 rpm
Compression ratio11.2±1 : 1
Lubricationwet sump lubrication
Clutchwet multi-plate clutch
Air filter
Manufacturer
D 900 - dry paper filter
FILTRAK


Carburettor

next ; Index

Identification, type,
manufacturer
VM 24
MIKUNI
Method of operationfuel enhancement mode
Main jet100
Needle jet0-0
Idling jet15
Needle adjustment5L10 / 4. notch on the top
Idle air adjusting screw1 to 2.5 turns out
Idling speed1800 + 100 rpm
Fuel level32 mm beyond carburettor centre
Float height20 + 1 mm from sealing surface of the carburettor casing
Exhaust gas settingmaximum 4,5 Vol % CO


Transmission

next ; Index

Number of gears6
Idling speed indicatorpilot lamp "N"
Type of transmissionspur pinion-change (wheel) gear with dog-type lock shift
Operationleft foot controls
Primary step-down gear systemspur gear
Secondary step-down gear system
 
SX: chain 1/2" x 5/16", 134 links
SM: chain 1/2" x 5/16", 132 links
 
RATIOMZ 125 SX variantMZ 125 SM variant
Primary ratio24/91 (1 : 3.792)
Secondary ratio16/52 (1 : 3.25)16/49 (1 : 3.063)
Total ratio 
1st gear12/351 : 35.9421 : 33.868
2nd gear16/301 : 23.1051 : 21.772
3rd gear17/241 : 17.3971 : 16.393
4th gear21/241 : 14.0831 : 13.271
5th gear23/221 : 11.7871 : 11.107
6th gear22/181 : 10.0821 : 9.501


Chassis

next ; Index

Type of frameTubular frame
Front suspension/spring travel [mm]Telescopic fork/220
Rear suspension/spring travel [mm]/settingLong swinging fork/220/adjustable spring base
TyresMZ 125 SX variantMZ 125 SM variant
Front tyre *90/90 - 21110/70 - 17
Rear tyre *120/80 - 18130/70 - 17
Tyre pressure, front, load depending190 kPa200 kPa (250 maximum permitted axle load)
Tyre pressure, rear, load depending200 kPa (250 maximum permitted axle load)230 kPa (260 maximum permitted axle load)
Front wheel, rim size1.84 x 212.75 x 17
Rear wheel, rim size2.50 x 184.00 x 17
BRAKES
Front brake, dimensionsSingle disc brake (ø 280) with 2-piston floating caliper, hand-operated
Rear brake, dimensionsSingle disc brake (ø 220) with 2-piston floating caliper, foot-operated


Electrical installation

next ; Index

Nominal voltage12V
Ignitioncontact-free condenser discharge ignition
Ignition pointspeed dependent, stationary 6°, dynamical to 34±2°
Spark plugNGK CR8E
Spark plug air gap [mm]0,7
Alternatoralternating current 180 W at 5000 rpm
Battery12V / 9Ah
BULBS
HeadlightH4 12V - 60/55W
Parking light12V/5W
Direction indicators12V - 10W
Tail light12V - 21/5W
Speedometer illumination12V - 2W
Indication lights12V - 1.2W
FUSES
Main fuse15 A
Indicator fuse3.0 A
Fan fuse7.5 A


Filling amounts and driving performance

next ; Index

FILLING AMOUNTS
Fuel typeNon-leaded petrol with an octane rating of 95 (ROz) or higher
Fuel12.5 l
Amount of reserve3.6 l
Engine oil,
(see section Maintenance - Oil change)
SAE 15 W-50 API SG/SH
SAE 10 W-40 API SG/SH
Oil change with filter change1.4 l
Total amount of coolant900 -50 [cm³]
Telescopic fork per member
Oil type
445 [cm³]
Forks oil SAE 7,5 - 10W
Shock-absorbing suspension
 
hydropneumatic
(no maintenance can be performed by a contract workshop)
DRIVING PERFORMANCE
Maximum speed110 km/h or 80 km/h in the performance-reduced version
Fuel consumption
Method of determination
3.2 [l/100km]
Point-to-point fuel consumption


Index

next ; Index

A

Accessories
Adjusting the clutch play
Adjusting the headlights
Air filter

B

Baggage
Battery
Brakes
Braking
Bulbs

C

Carburettor
Carrying baggage
Chain care
Chain slack
Changing gear
Changing light bulbs
Changing spark plugs
Changing the oil
Changing the tyres
Chassis
Checking the brake discs
Checking the brake fluid level
Checking the brake pads
Checking the coolant
Checking the oil level
Choke
Cleaning
Cleaning the fuel cock

D

Dimensions
Dipped beam
Driving chain
Driving performance

E

Electrical installation
Engine number
Engine stop button

F

Filling amounts
Foot brake pedal
Front wheel suspension
Fuel cock
Fuel tank cap
Full beam
Fuses

G

Gear change pedal

H

Handlebar adjustments
Headlight
Headlight flasher

I

Ignition lock
Indicator switch
Instrument panel

K

Key number

L

Left handlebar controls

M

Maintenance schedule

O

Oil quantities
Oil types
On-board tool kit
Operating elements

P

Parking light
Protect the environment
Protective clothing

R

Rear wheel suspension
Recommissioning after storage
Refilling the coolant
Refuelling
Replacing fuses
Right handlebar controls
Running in

S

Safe driving
Safe riding
Seat lock
Side stand
Spark plug
Starter button
Starting the engine
Stopping the engine
Storage

T

Tool kit
Transmission
Troubleshooting
Tyre pressure
Tyres

V

Vehicle identification number

W

Weights
Winter driving instructions


Notes

Wiring Diagram

Index


LEGEND

K139-34.009 Cable harness
K239-34.022 Positive cable
K339-34.023 Ground cable
K4Starter cable
K5Cable - pick up
K6Sidestand cable
K7Cable, handlebar controls, left
K8Cable, handlebar controls, right
K9Cable, ignition and steering lock
K10Cable wireness for instruments

1Headlight
1aLow beam
1bHigh beam
1cParking light
2Front stop light switch
3Instruments / Tachometer
3aOil pressure warning light
3bFlasher control light
3cIdling speed pilot lamp
3dHigh beam pilot lamp

3eTemperature warning light
3fTachometer lighting
4Handlebar controls, left
4aLight switch
4bHigh beam / Low beam
4cHeadlight flasher
4dIndicator lights
4eHorn
5Handlebars controls, right
5aEngine stop switch

5bStarter switch
6Ignition switch
7Front indicator, left
8Front indicator, right
9Sidestand switch
10Horn
11Fan
12Thermoswitch
13Ignition unit
14Starter relay

15Starter motor
16Rectifier / regulator
17Ignition coil
18Spark plug
19Cut-off relay
20Flasher unit
21Battery
22Fuse box
23Rear stop light switch
24Engine
25Neutral gear switch
26Engine ground point
27Rear light (BSKL)
28Rear indicator, right
29Rear indicator, left
30Back current barrier diode 3A type
31Back current barrier diode 3A type
32Back current barrier diode 3A type
33Oil pressure
34Back current barrier diode 3A type
35Speed sensor

AParallel connector 15 front
BParallel connector 15 rear
CParallel connector, ground front
DParallel connector, ground rear
FParallel connector, left indicator
GParallel connector, right indicator
HParallel connector, ground

Detachable connection
Permanent connection
Flat plug connector
Round plug connector


COLOR CODE

blblue
brbrown
geyellow
gngreen
grgrey
lilalilac
orangeorange
rtred
swblack
wswhite
bl/geblue/yellow
bl/wsblue/white
br/wsbrown/white
gn/rtgreen/red
gn/wsgreen/white
rt/swred/black
rt/wsred/white
sw/blblack/blue
sw/geblack/yellow
sw/gnblack/green
sw/wsblack/white
rsrosa
dbldark blue


Index